Mastering the Kadence Table of Contents: The Ultimate SEO Guide for Solopreneurs

In the world of SEO, Content is King, but Structure is the Kingdom. For solopreneurs building authority, long-form articles (1,500+ words) are the gold standard. However, without a Table of Contents (TOC), your “Kingdom” is a maze. A TOC provides Google with a roadmap of your expertise and gives your readers a “Skip to the Good Part” button.
Whether you are on the Kadence Express Plan or the Full Pro Bundle, here is how to build a professional, SEO-optimized Table of Contents.
Why Every Blogger Needs a TOC (The SEO Perspective)
Before we dive into the “how,” let’s look at the “why.” Google rewards well-structured data in two major ways:
- Jump Links: Google often displays “Jump to section” links directly in search results, increasing your Click-Through Rate (CTR).
- Featured Snippets: A clear heading structure (H2s and H3s) within a TOC makes it easier for Google to pull your content into the “Position Zero” snippet at the top of the page.
Option 1: The Kadence Express Method (Manual Mastery)
The Express plan is built for speed. You use the native Kadence Table of Contents Block directly in your post. This is the most performance-friendly method because it only adds code to the specific pages that need it.
Step 1: Insert the Block
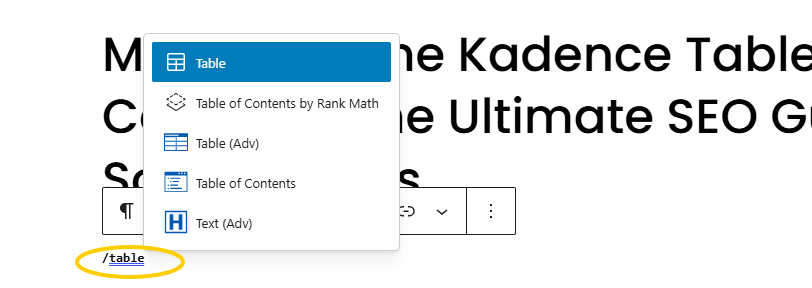
In your WordPress editor, type /table and select the Table of Contents block (the blue icon). It will automatically scan your article and generate a list based on your headings.
Step 2: The “Clean-Up” Settings
To avoid a “wall of links,” you must refine your settings in the General sidebar:
- Allowed Headers: Toggle H1 to OFF (you don’t need to repeat the title). Keep H2 to ON. Only use H3 if your article is a deep-dive technical guide; otherwise, keep it off for a cleaner look.
- Collapsible Settings: * Toggle Enable Callback to ON.
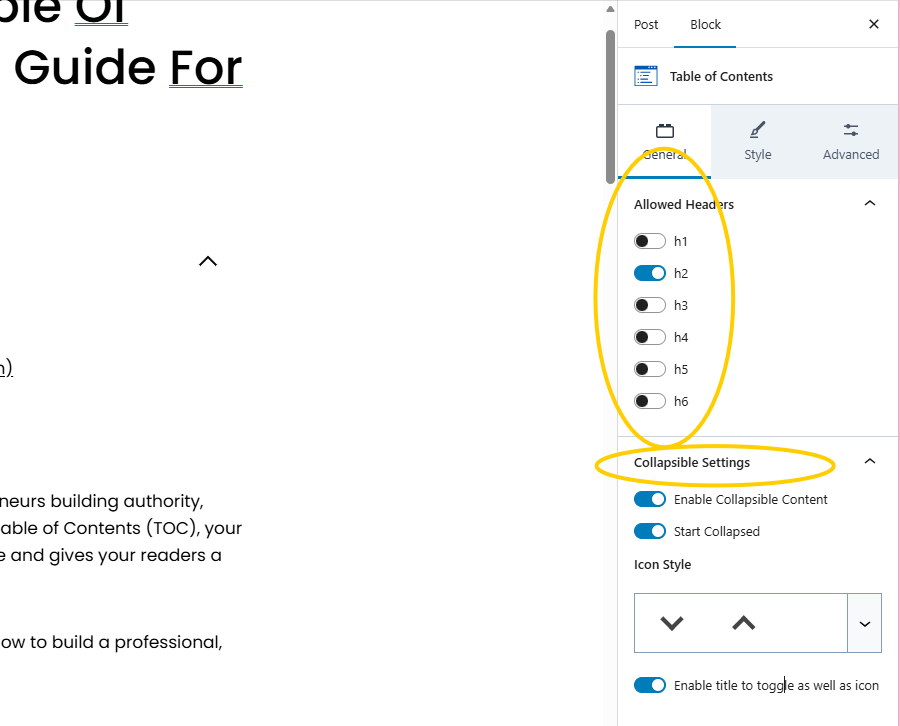
- Toggle Start Collapsed to ON. This is a “User Experience” (UX) win—it keeps your intro visible while tucked away for those who need it.
- The Golden Toggle: Turn ON “Enable title to toggle as well as icon.” This allows users to click the text itself to open the menu.
Step 3: Pro-Level Styling
Go to the Style tab (the paintbrush icon) to match your brand:
- Columns: Change this from 1 to 2. This splits your list into side-by-side columns, cutting the vertical height in half.
- Typography: Set the font size to 14px or 15px. It should look like a utility, not the main headline.
- Go to the Style tab (the paintbrush icon).
- Change the Title Color to your brand’s signature
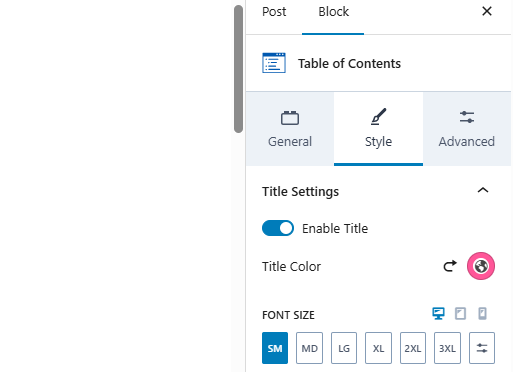
- This makes it clear to the reader that it’s an interactive element they should click on.
- You can also make a box shadow for the table of contents area like shown below:
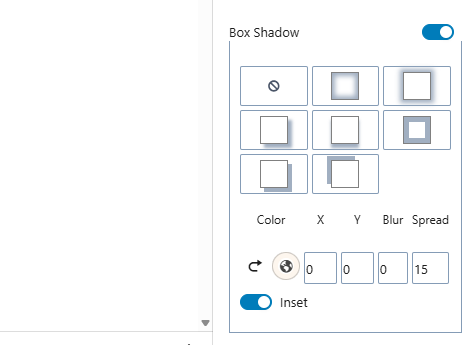
Since you are on the Express Plan, I recommend Option 1, as it is the fastest way to “paste” your exact design into new or existing posts.
The “Synced Pattern” Method (Highly Recommended)
This is the most efficient way for Express users. Instead of just copying the “look,” you save the entire block as a template.
- Save your Style: * Go to the post where the Table of Contents looks perfect.
- Click on the Table of Contents block.
- In the toolbar that appears above it, click the three vertical dots (Options).
- Select “Create Pattern”.
- Give it a name (e.g., My Branded TOC).
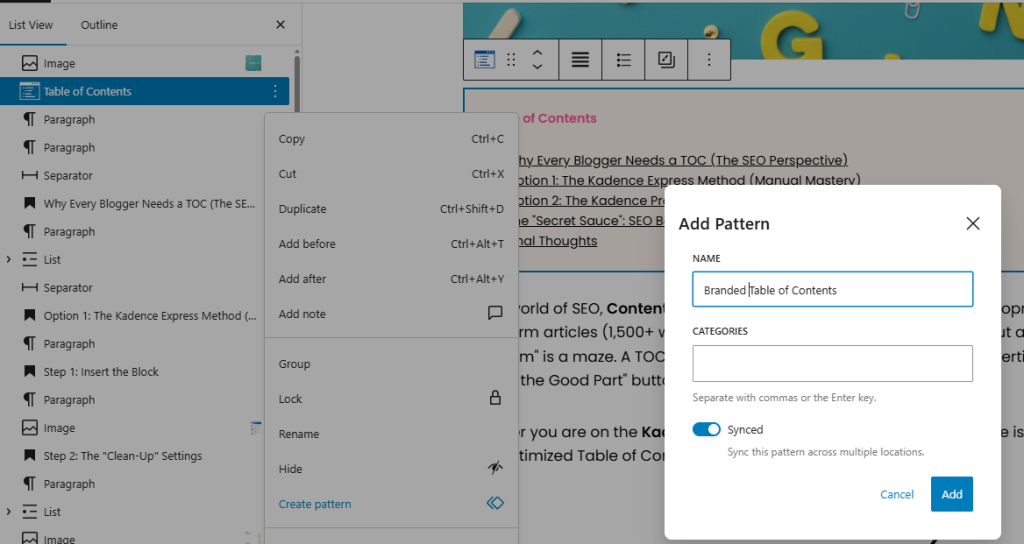
- Crucial: Ensure the “Synced” toggle is turned ON.
- Paste to Other Posts: * Open any other blog post.
- Click the (+) icon at the top left of the editor.
- Switch to the Patterns tab, then click “My Patterns.”
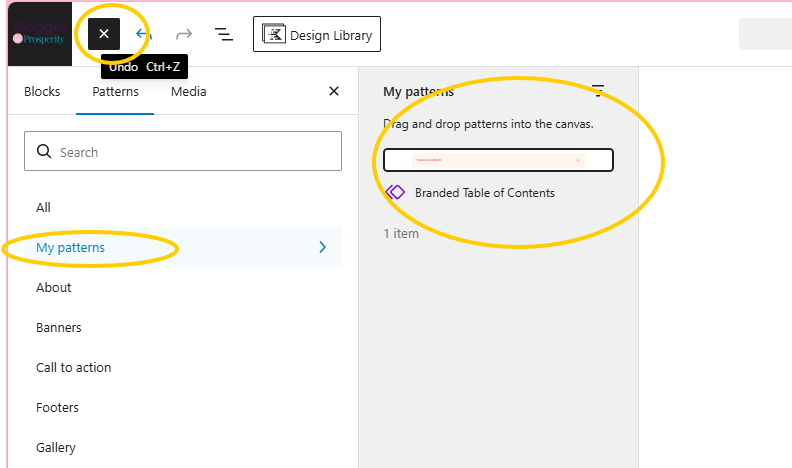
- Click your My Branded TOC and it will appear exactly as you styled it.
- The “Superpower”: If you ever change the color or font of this synced pattern in one post, it will automatically update on every other post where you used it!
Option 2: The Kadence Pro Method (The “Set It and Forget It” Automation)
If you have Kadence Pro, you have access to Hooked Elements. This is for the power user who wants a TOC to appear on every single post automatically. I have the express plan at the moment and will have to create a manual TOC for every post. It is easier with the pro version as you can use hooked elements and build one TOC template to be pulled into every article. I do regret starting with the express version because now that I know the basics, I could do so much more with the pro version. I will definitely be upgrading my Kadance plan soon!
Step 1: Create the Element
- Navigate to Appearance > Kadence > Elements.
- Click Add New and select Content Section.
- Add the Table of Contents Block and style it exactly as described in the Express section above.
Step 2: Configure the “Hook”
This is where the magic happens. In the Element Settings sidebar:
- Placement: Select “Inside the Content” and then “Before First Heading Tag.” This ensures the TOC always appears right before your first H2.
- Display Settings: Set this to Single Posts.
- User Settings: Set to All Users.
The Result: You never have to add a TOC block again. Kadence will “inject” your styled TOC into every article you publish, past and future.
The “Secret Sauce”: SEO Best Practices
To ensure your TOC actually helps you rank, follow these three rules:
- The “One H1” Rule: Your page must only have one H1 (your title). All sub-sections must be H2s. This is the “little line of code” logic—Google uses the H1 to define the topic and H2s to define the sub-topics.
- Keyword-Rich Headings: Don’t just name a section “Ideas.” Name it “20 Profitable Solopreneur Ideas for 2026.” This puts your keywords inside the TOC links, which Google weighs heavily.
- Smooth Scrolling: In the TOC block settings, ensure “Enable Smooth Scroll” is ON. This keeps users on your site longer because the “jump” feels elegant rather than jarring.
Before optimizing individual posts, make sure you’ve built a structured blog foundation that supports long-term SEO growth.
Final Thoughts
If you are on the Express Plan, use Method 1 and save your TOC as a Synced Pattern. This gives you 90% of the Pro benefits for 0% of the extra cost. If you have a massive site with hundreds of posts, the Pro Hooked Elements are worth every penny for the time they save.